Step-By-Step Guide Converting Obsidian Markdown into HTML using MKDocs Hosted on GitHub Pages
This guide is presuming you have already downloaded obsidian, git, and have already setup a vault, made notes and experienced the joys of interlinking ideas together with the markdown language.
Now, you are wondering how can I share my ideas, innovations, or designs online to others, or in the self-demonstrated case of this very website; a place to store my shit.
Step-By-Step Guide:
1) Install & Setup Obsidian Git Community Plugin
2) Setting up GitHub Repository
3) Editing the GitHub Workflows
4) GitHub Pages Setup
1) Install & Setup Obsidian Git Community Plugin
Step 1) Go to Settings

Step 2) Enable Community Plugins
Enable Community Plugins
Step 3) Find Git in Community Plugins

Please proceed to enable it.
Step 3.5 (Optional) Ensure Git Path is Valid
Only necessary if you changed the Git Path when installing it.

2) Setting up GitHub Repository
Step 1) Go onto GitHub (Make a New Repository From Template)
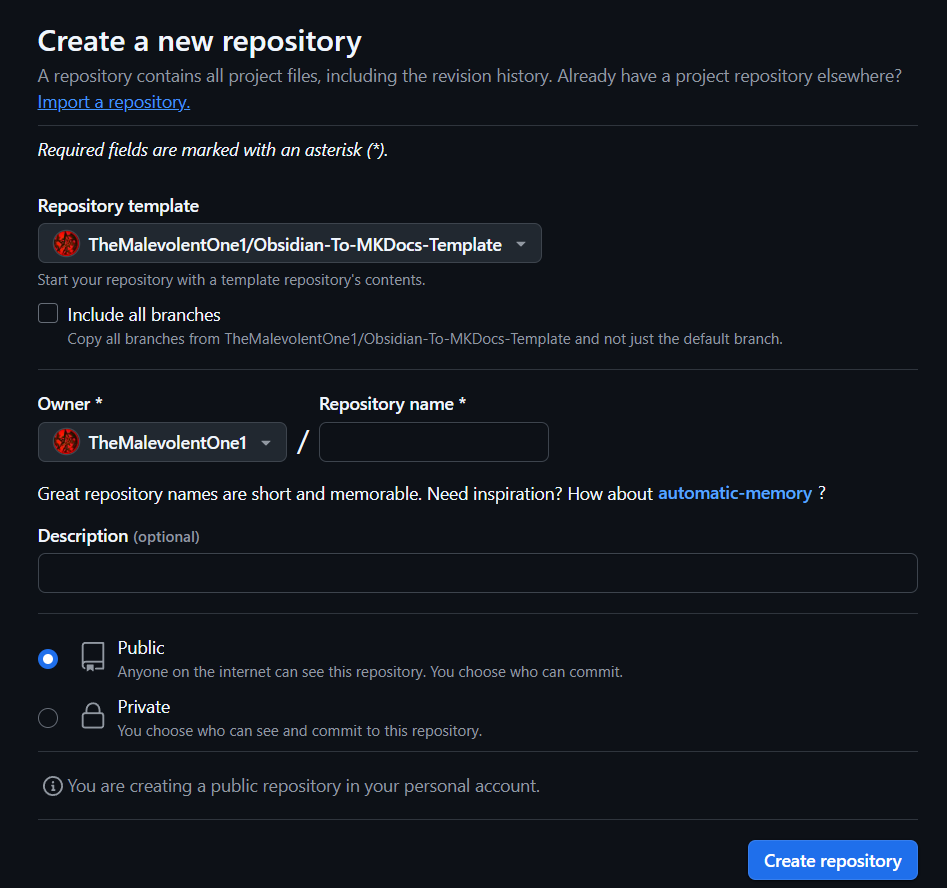
Note: Currently, the generate_webpages.yaml contains placeholder values that must be replaced with paths and settings specific to your vault. Until these are updated, the workflow will fail.
Step 2) Go onto GitHub (Settings -> Developer Settings)


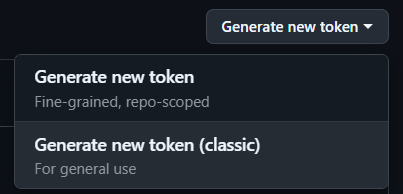
Step 2.5) Make Personal Access Token
WARNING: Once generated and copied the token cannot be retrieved again.
In event of key loss, generating a new key is the best course of action.
Step 3) Clone the Repository Obsidian
Control + P to open the Command Palette in obsidian and type Git:


Enter the remote URL as follows:
https://<USERNAME>:<PERSONAL_ACCESS_TOKEN>@github.com/<REPO_OWNER>/<REPO>.git

For this I called my folder "GitHub-Pages"


You will then be asked for the depth of the clone. (Assuming Step 4.5) This can just be 0 or nothing given the repository is empty.

Once enter is clicked the Repo will be cloned (Unless empty).
3) Editing the GitHub Workflows
Step 1) Go into the vault in File Explorer)
In folders, (if on windows) find the folder that contains your obsidian vault and find the


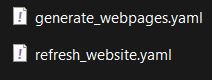
Before we edit the following files, let me briefly explain their purpose:
-
The first file is a GitHub Action workflow that runs automatically whenever a commit is pushed to the main branch. Its primary role is to copy specific files and folders from your repository into a
docsdirectory, which is then used to build and deploy a static site to thegh-pagesbranch. This site is powered by MkDocs, a tool that converts Markdown files into static HTML pages. -
The second file is another GitHub Action, however this one needs no changes whatsoever, as it's sole purpose is entirely GitHub related. It triggers a site rebuild and is only necessary for testing purposes.
Friendly Reminders
Reminder 1: If your repository is set to public when created, all contents of your Obsidian vault will be openly accessible to anyone on the internet.
Reminder 2: Any files copied during this workflow will be publicly available via the gh-pages branch URL unless explicitly excluded in your mkdocs.yaml configuration.
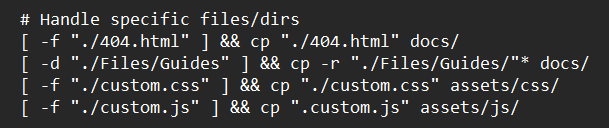
Examples of how to handle folders and directories for copying to the site
4) GitHub Pages Setup
Step 1) Go onto GitHub (Settings->Pages)


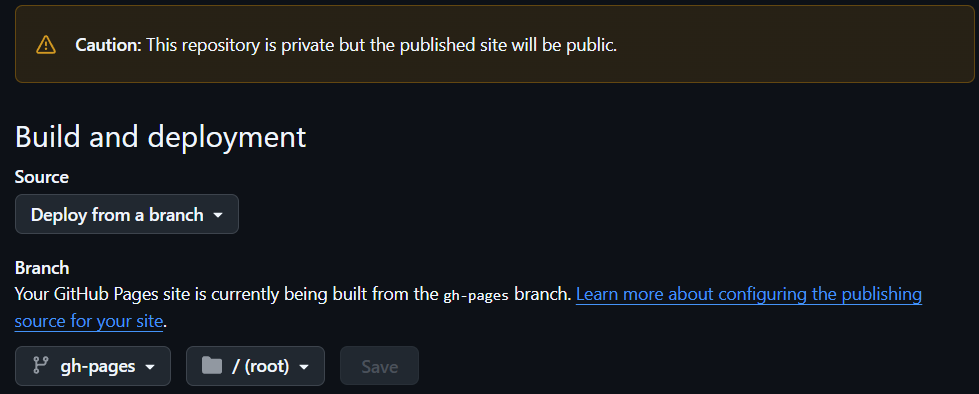
GitHub Pages Configuration
- Caution: The warning banner at the top warns that even if your repository is private, the published site and its branch files (accessible via the site's URL) will be public unless you exclude them in the mkdocs.yaml file. This is a key reminder to safeguard sensitive content.
- Select Source:
- Options: GitHub Actions or Deploy from a branch.
- Select Deploy from a branch.
- Then, choose gh-pages as the branch and the root directory (/), unless the generate_webpages.yaml file has been modified to copy the files to a different directory.
Additional Tips:
git config --global core.longpaths true(Allows long paths allowing for more elaborate organisation of folders and resources)
(This allows Git to handle paths longer than 260 characters, which is a common issue on Windows systems.)In the event of
FileNameTooLongerror see: FileNameTooLong Obsidian Error (Windows) Fix
git config --global core.autocrlf true(CRLF (Carriage Return + Line Feed) being the Windows form of the Linux LF (Line Feed) denoting the end of line points in files.)
CRLF & LFSometimes when using Git on multiple devices while using the
Obsidian Syncyou may get anUnrelated Historieserror, the solution to this is:git pull origin main --allow-unrelated-histories