Network Foundations Contents
Previous Section
Chapter 1: Keep me in the Loop
For the first chapter of this assessment, we will be showcasing the HTB Academy Pwnbox --- a fully functional Linux machine running Parrot OS, accessible entirely through a web browser. We provide it to our students to serve as their workstation when completing the various exercises and labs available on our platform. If you've never used Linux before, have no fear. Everything will be completely guided. When you are ready to begin, scroll down to select your Pwnbox location, and click Launch Instance.
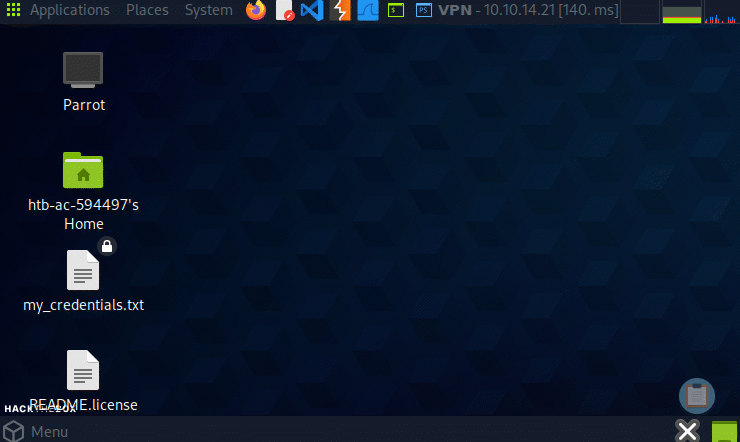
Once the Pwnbox is up and running, feel free to press the Full Screen button for more visibility. Then, use your mouse cursor to open the Parrot Terminal as shown in the example below.
Launching the Parrot Terminal
We will start by investigating the network interfaces available on the Pwnbox. Type the following command into the terminal and press enter.
Code: shell
The ifconfig tool is used to configure network interfaces and display their current status. By default, it only shows active interfaces, but using the -a flag will display all interfaces, including those that are currently down. After running the command, we should see three interfaces: ens3, lo, and tun0, along with a detailed output. Take a few moments to review the information and note any similarities or differences between the interfaces. Don't worry if some of it isn't clear yet. Everything will make more sense as we continue.
Keep me in the Loop
┌─[eu-academy-1]─[10.10.14.21]─[htb-ac-594497@htb-5mix2gkv1a]─[~]
└──╼ [★]$ ifconfig -a

ens3: flags=4163<UP,BROADCAST,RUNNING,MULTICAST>  mtu 1500
       inet 209.50.61.235  netmask 255.255.252.0  broadcast 209.50.61.255
       inet6 fe80::a4ba:3bff:fe08:1e4e  prefixlen 64  scopeid 0x20<link>
       ether a6:ba:3b:08:1e:4e  txqueuelen 1000  (Ethernet)
       RX packets 30046  bytes 37369216 (35.6 MiB)
       RX errors 0  dropped 0  overruns 0  frame 0
       TX packets 20239  bytes 33367968 (31.8 MiB)
       TX errors 0  dropped 0 overruns 0  carrier 0  collisions 0

lo: flags=73<UP,LOOPBACK,RUNNING>  mtu 65536
       inet 127.0.0.1  netmask 255.0.0.0
       inet6 ::1  prefixlen 128  scopeid 0x10<host>
       loop  txqueuelen 1000  (Local Loopback)
       RX packets 44771  bytes 33774927 (32.2 MiB)
       RX errors 0  dropped 0  overruns 0  frame 0
       TX packets 44771  bytes 33774927 (32.2 MiB)
       TX errors 0  dropped 0 overruns 0  carrier 0  collisions 0

tun0: flags=4305<UP,POINTOPOINT,RUNNING,NOARP,MULTICAST>  mtu 1500
       inet 10.10.14.21  netmask 255.255.254.0  destination 10.10.14.21
       inet6 dead:beef:2::11bb  prefixlen 64  scopeid 0x0<global>
       inet6 fe80::3c16:f601:d437:d71b  prefixlen 64  scopeid 0x20<link>
       unspec 00-00-00-00-00-00-00-00-00-00-00-00-00-00-00-00  txqueuelen 500  (UNSPEC)
       RX packets 164  bytes 13776 (13.4 KiB)
       RX errors 0  dropped 0  overruns 0  frame 0
       TX packets 170  bytes 14064 (13.7 KiB)
       TX errors 0  dropped 0 overruns 0  carrier 0  collisions 0
There is certainly a lot to unpack. We see three unique IPv4 addresses. We see some IPv6 addresses as well. However, one interface in particular stands out from the rest. Something seems very different about the lo interface.
Keep me in the Loop
 lo: flags=73<UP,LOOPBACK,RUNNING>  mtu 65536      ### Greater MTU (maximum transmission unit) compared to other interfaces
       inet 127.0.0.1  netmask 255.0.0.0
       inet6 ::1  prefixlen 128  scopeid 0x10<host> ###  ipv6 address is ::1 --- scopeid is "host" rather than "link"
       loop  txqueuelen 1000  (Local Loopback)   ### Layer-2 information has phrases "loop" and "local loopback"
       RX packets 44771  bytes 33774927 (32.2 MiB)
       RX errors 0  dropped 0  overruns 0  frame 0
       TX packets 44771  bytes 33774927 (32.2 MiB)
       TX errors 0  dropped 0 overruns 0  carrier 0  collisions 0
What we are looking at is known as the loopback address, and it is always associated to the IPv4 address 127.0.0.1. It's the IP address used when a device needs to send network data to itself. You may be wondering what purpose this serves; there are actually several. It's often used for testing, as a way to make sure an application is working as intended before going live on the network. It is also used by servers to keep certain services hidden from outside users. Think of an e-commerce website that utilizes authentication with its clients (i.e. registered acounts with usernames and passwords). Credentials and session cookies are typically stored in a database. Rather than have the database exposed to the public, it instead can only be accessed by the server itself. When a user attempts to log into the website, the website acts as an API between the user and the database. The server queries its own database to retrieve information on behalf of the end user.
Let's see if the Pwnbox makes use of the loopback address. In your terminal, enter the following command:
Code: shell
The netstat utility displays network connections, routing tables, and interface statistics. With the options shown above, it lists all open or listening TCP and UDP ports for IPv4 in the format "IP:PORT". If permissions allow, it may also show the name of the program responsible for each open port. Take a moment to review the output. Do you notice any services running on the loopback address?
Keep me in the Loop
┌─[eu-academy-1]─[10.10.14.21]─[htb-ac-594497@htb-5mix2gkv1a]─[~]
└──╼ [★]$ netstat -tulnp4

(Not all processes could be identified, non-owned process info
 will not be shown, you would have to be root to see it all.)
Active Internet connections (only servers)
Proto Recv-Q Send-Q Local Address           Foreign Address         State       PID/Program name
tcp        0      0 127.0.0.1:5901          0.0.0.0:*               LISTEN      2814/Xtigervnc
tcp        0      0 127.0.0.1:631           0.0.0.0:*               LISTEN      -
tcp        0      0 0.0.0.0:22              0.0.0.0:*               LISTEN      -
tcp        0      0 0.0.0.0:111             0.0.0.0:*               LISTEN      -
tcp        0      0 209.50.61.235:80        0.0.0.0:*               LISTEN      -
udp        0      0 0.0.0.0:5353            0.0.0.0:*                           -
udp        0      0 0.0.0.0:43446           0.0.0.0:*                           -
udp        0      0 0.0.0.0:68              0.0.0.0:*                           -
udp        0      0 0.0.0.0:111             0.0.0.0:*                           -
udp        0      0 10.10.14.21:123         0.0.0.0:*                           -
udp        0      0 209.50.62.174:123       0.0.0.0:*                           -
udp        0      0 127.0.0.1:123           0.0.0.0:*                           -
udp        0      0 0.0.0.0:123             0.0.0.0:*                           -
udp        0      0 0.0.0.0:631             0.0.0.0:*                           -
udp        0      0 0.0.0.0:33423           0.0.0.0:*                           -
Now, try running the command shown below.
Keep me in the Loop
When we remove the -n option, the output will be displayed as "hostname:service" rather than "IP:PORT". We can see that the loopback IP address is resolved to localhost. The ens3 IP address is resolved to the hostname of the Pwnbox. Also, it is worthwhile to note that a service listening on 0.0.0.0 is listening on all interfaces.
Keep me in the Loop
┌──[eu-academy-1]─[10.10.14.21]─[htb-ac-594497@htb-5mix2gkv1a]─[~]
└──╼ [★]$ netstat -tulp4

(Not all processes could be identified, non-owned process info
 will not be shown, you would have to be root to see it all.)
Active Internet connections (only servers)
Proto Recv-Q Send-Q Local Address           Foreign Address         State       PID/Program name
tcp        0      0 localhost:5901          0.0.0.0:*               LISTEN      2814/Xtigervnc
tcp        0      0 localhost:ipp           0.0.0.0:*               LISTEN      -
tcp        0      0 0.0.0.0:ssh             0.0.0.0:*               LISTEN      -
tcp        0      0 0.0.0.0:sunrpc          0.0.0.0:*               LISTEN      -
tcp        0      0 htb-5mix2gkv1a.htb:http 0.0.0.0:*               LISTEN      -
udp        0      0 0.0.0.0:mdns            0.0.0.0:*                           -
udp        0      0 0.0.0.0:43446           0.0.0.0:*                           -
udp        0      0 0.0.0.0:bootpc          0.0.0.0:*                           -
udp        0      0 0.0.0.0:sunrpc          0.0.0.0:*                           -
udp        0      0 htb-5mix2gkv1a:ntp      0.0.0.0:*                           -
udp        0      0 htb-5mix2gkv1a.htb-:ntp 0.0.0.0:*                           -
udp        0      0 localhost:ntp           0.0.0.0:*                           -
udp        0      0 0.0.0.0:ntp             0.0.0.0:*                           -
udp        0      0 0.0.0.0:631             0.0.0.0:*                           -
udp        0      0 0.0.0.0:33423           0.0.0.0:*                           -
With this information, we now have some insight as to how we are able to see, and interact, with the Pwnbox. Earlier in the module we learned that protocol used when browsing websites is HTTP, via the well-known port 80. As we can see, the Pwnbox is indeed listening on port 80. This explains how we are able to make a connection via web browser. Subsequently, we can state with confidence that the IP tied to the ens3 interface is the public IP address of the Pwnbox. Remember, public IP's can be accessed over the internet.
We also see the VNC service running on the loopback address. VNC (Virtual Network Computing) is a protocol used for remote screen sharing and remote access. Since students can access the Pwnbox desktop environment through their web browser, there is likely some form of port forwarding in place. This would allow traffic sent over HTTP to be forwarded to the VNC service running on the loopback address.
Port forwarding is a technique that allows traffic sent to one TCP/UDP port to be redirected to another—even across different machines. This also another way the loopback address can be utilized. For example, in the scenario below, a Windows host forwards its local port 8888 to a Linux VM's SSH port (22). The Linux machine is running as a virtual machine with NAT enabled, meaning it does not have a directly accessible IP on the network. Instead, the Windows host acts as an intermediary, forwarding traffic to it.
Note that the topic of port forwarding is beyond the scope of this module. However, it is certainly something to be aware of, and is a wonderful example of the power and possibilities available through computer networking. Now that we've investigated the lo interface (and the ens3 interface in the process), tun0 is all that remains. And with that, we conclude chapter one.
Chapter 2. - Having Tuns of Fun
→ Click to Show ←
Chapter 2: Having Tuns of Fun
At the beginning of chapter one, we mentioned that the Pwnbox is used to interact with target machines in our lab environments. At the end of chapter one, we successfully investigated two out of the three available network interfaces:
- Loopback (lo): Allows the Pwnbox to send network traffic to itself.
- Public IP (ens3): Enables the Pwnbox to communicate with us over the internet.
That leaves one remaining interface: tun0. Based on its name, we can infer that it’s a tunnel interface, commonly associated with VPNs (Virtual Private Networks). Since lab targets exist on a separate private network, the Pwnbox must establish a secure connection to that environment, enabling us to reach them.
Let's confirm this by checking which route the Pwnbox takes to communicate with the target. Scroll to the end of this section and press Click here to spawn the target system!. After a few moments, a target machine will spawn, and we will be given its IP address.
Then, return to the Pwnbox and enter the following command into the Parrot Terminal:
Code: shell
This command will display the route taken for any traffic sent from the Pwnbox to reach the target.
Having Tuns of Fun
┌──[eu-academy-1]─[10.10.14.21]─[htb-ac-594497@htb-5mix2gkv1a]─[~]
└──╼ [★]$ ip route get 10.129.233.197

10.129.233.197 via 10.10.14.1 dev tun0 src 10.10.14.21 uid 1002
    cache
Our theory has been confirmed—all traffic to the target is routed through tun0, a VPN tunnel that connects the Pwnbox to the private lab network. This allows us to interact with lab machines as if they were on the same local network. By using a VPN configuration file and software such as OpenVPN, computers will connect to the VPN server, which provides access to the network. HTB Academy's VPN is available to download at https://academy.hackthebox.com/vpn, for those who prefer to use their own workstation rather than Pwnbox.
Let's begin our first interaction with the target machine. We typically always begin by using ping. The ping is a networking utility used to test the reachability of a host on a network. It does not use TCP or UDP ports, making it a Layer 3 protocol in terms of the OSI model. Type the following command into your terminal and observe the output.
Code: shell
Here, we are sending four pings towards our target. Note that in Linux, if we do not specify the ping count, it will send pings indefinitely until we press Ctrl + C into the terminal.
Having Tuns of Fun
┌─[eu-academy-1]─[10.10.14.21]─[htb-ac-594497@htb-5mix2gkv1a]─[~]
└──╼ [★]$ ping -c4 10.129.233.197

PING 10.129.233.197 (10.129.233.197) 56(84) bytes of data.
64 bytes from 10.129.233.197: icmp_seq=1 ttl=127 time=71.6 ms
64 bytes from 10.129.233.197: icmp_seq=2 ttl=127 time=71.3 ms
64 bytes from 10.129.233.197: icmp_seq=3 ttl=127 time=71.8 ms
64 bytes from 10.129.233.197: icmp_seq=4 ttl=127 time=71.2 ms

--- 10.129.233.197 ping statistics ---
4 packets transmitted, 4 received, 0% packet loss, time 3003ms
rtt min/avg/max/mdev = 71.205/71.470/71.776/0.223 ms
We've now confirmed that the target is reachable from our attack host. A few things to take note of are the ttl and the time. The ttl , which stands for time-to-live, tells us how many "hops" our packets are allowed to take in order to reach the target. This rarely applies to devices on the same local network as us, but rather devices on the internet that require our packets to hop through multiple routers in order to reach their intended destination. The information next to time gives us an idea of how much latency there is on the network. In this example above, we see each ping takes roughly 71 milliseconds.
We have just confirmed that our attack host can communicate with the target, by pinging the IP address of the target machine. Our next step is to enumerate open TCP/UDP ports on the machine. Just as we used the netstat utility to view the open ports on the Pwnbox, there is another tool we can use to determine the open ports on a remote machine. This tool is nmap, and it is absolutely fundamental for any current or aspiring infosec professional. Let's begin by enumerating the open TCP ports on our target. Enter the following command into your terminal.
Code: shell
After a few moments, we will see nmap return the open TCP ports present on the target.
Having Tuns of Fun
┌─[eu-academy-1]─[10.10.14.21]─[htb-ac-594497@htb-5mix2gkv1a]─[~]
└──╼ [★]$ nmap 10.129.233.197

Starting Nmap 7.94SVN ( https://nmap.org ) at 2025-02-08 18:07 CST
Nmap scan report for 10.129.233.197
Host is up (0.073s latency).
Not shown: 993 closed tcp ports (reset)
PORT     STATE SERVICE
21/tcp   open  ftp
80/tcp   open  http
135/tcp  open  msrpc
139/tcp  open  netbios-ssn
445/tcp  open  microsoft-ds
3389/tcp open  ms-wbt-server
5357/tcp open  wsdapi
We see several open ports available. Ports 135,139,and 445 will typically always be open on a Windows-based host. Port 3389 is the port used for Remote Desktop Protocol, or RDP for short. It is another common service seen on Windows machines. Port 5357 is used for Microsoft's Web Services for Devices API - another Windows protocol, used for device discovery on the network.
We've now come to a thorough understanding of the three network interfaces of the Pwnbox and have verified that we can interact with the target machine. With that, Chapter Two concludes. You're now ready to complete the challenge questions and assessment.
If you'd like to continue further, Chapter Three is optional and will guide you through interacting with the target machine using specific ports and protocols.
Chapter 3. - Target Acquired (OPTIONAL)
→ Click to Show ←
Chapter 3: Target Acquired (Optional)
For our final chapter, we will be focusing on the target machine's port 21 and port 80, used for FTP (File Transfer Protocol) and HTTP (Hyper-Text Transport Protocol). Let's perform another nmap scan, this time focused only on the two aforementioned ports.
Code: shell
By adding the -sC and -sV options to our scan, this will allow nmap to determine the version of whatever program is listening on a given port, as well as additional information (such as how a particular service might be configured).
Target Acquired
┌─[eu-academy-1]─[10.10.14.21]─[htb-ac-594497@htb-5mix2gkv1a]─[~]
└──╼ [★]$ nmap -p21,80 -sC -sV 10.129.233.197

Starting Nmap 7.94SVN ( https://nmap.org ) at 2025-02-08 19:17 CST
Nmap scan report for 10.129.233.197
Host is up (0.071s latency).

PORT   STATE SERVICE VERSION
21/tcp open  ftp     Microsoft ftpd
| ftp-syst:
|_  SYST: Windows_NT
|_ftp-anon: Anonymous FTP login allowed (FTP code 230)
80/tcp open  http    Microsoft HTTPAPI httpd 2.0 (SSDP/UPnP)
Service Info: OS: Windows; CPE: cpe:/o:microsoft:windows

Service detection performed. Please report any incorrect results at https://nmap.org/submit/ .
Nmap done: 1 IP address (1 host up) scanned in 11.05 seconds
Nmap tells us that the FTP service has Anonymous FTP enabled, meaning that anyone is able to connect to the FTP service (typically by providing the username anonymous). However, the HTTP service on port 80 does not return as much information. Generally, nmap will be able to fingerprint the webserver software in place (such as Apache, Nginx, or IIS). Our initial nmap scan operates at layer 4 of the OSI model --- that is, determining if the port is open or closed at the TCP/UDP level. For scans such as the version scan (-sV) or default scripts (-sC), nmap uses protocol-specific layer 7 packets. Because port 80 showed no additional information after our second scan, we can hypothesize that there may be a type of request filtering in place. We will touch on this more in a bit.
IMPORTANT: While it is not illegal, it is considered unethical to use nmap (or any port scanning utility) against a device that you do not either own, or have explicit permission to be scanning.
Let's take a look at the FTP service running on port 21. To connect, we will use netcat, a utility for making raw TCP/UDP connections. After we connect with netcat, whatever we characters we type in will be transmitted to the port in which we are connected. Rather than using a specific FTP client utility, we will use netcat to better understand how the FTP protocol works. On the flipside, for the HTTP service, software such as a web browser (or the curl and wget command line tools) formulate and send the protocol-specific data for us. Whenever you are ready, enter the following command into your terminal and press enter.
Code: shell
Here, we are telling netcat to connect to port 21 on the target machine. Once connected, we are greeted with a banner from the FTP service, indicating we have successfully connected.
Target Acquired
┌─[eu-academy-1]─[10.10.14.21]─[htb-ac-594497@htb-5mix2gkv1a]─[~]
└──╼ [★]$ nc 10.129.233.197 21

220 Microsoft FTP Service
Next, we will login as an anonymous user with the commands shown below, and then specify we will be using Passive Mode:
Code: shell
The reason we provided the [Ctrl + V] [Enter] [Enter] is because FTP requires a return character and new-line character (\r\n) for its commands. When we press Enter on our keyboard, Netcat only sends the \n.
Target Acquired
┌─[eu-academy-1]─[10.10.14.21]─[htb-ac-594497@htb-5mix2gkv1a]─[~]
└──╼ [★]$ nc 10.129.233.197 21

220 Microsoft FTP Service
USER anonymous^M
331 Anonymous access allowed, send identity (e-mail name) as password.
PASS anything^M
230 User logged in.
PASV^M
227 Entering Passive Mode (10,129,233,197,194,40).
FTP (File Transfer Protocol) uses two separate channels for its operations:
| Channel | Purpose | Port |
|---|---|---|
| Control Channel | Sends FTP commands (USER, PASS, LIST, RETR, etc.) | Port 21 |
| Data Channel | Transfers files and directory listings | Dynamic Port (Varies by mode: Active or Passive). |
Here, we have selected passive mode, and subsequently need to re-connect to the FTP server on another port. To determine the port number, we need to do some calculations. This is mainly due to limitations in the FTP protocol, as the full port cannot be displayed at once, so it is instead split to 2 small number 'p1 and p2; the last 2 numbers in the above output'. Then the real port is calculated as 'p1*256 + p2'. See this documentation for more info.
So, to calculate the port number, we will use the last two numbers shown (in the example above, they are 194 and 40). We will take the first number and multiply it by 256, then add the second number.
194 * 256 + 40 = 49704
Let's open a new Parrot Terminal by clicking File (located in the top left hand corner of your current Parrot Terminal), then select Open Terminal -> Bash. Then, in our new Terminal, we will use netcat to connect to the data channel.
Code: shell
Target Acquired
┌─[eu-academy-1]─[10.10.14.21]─[htb-ac-594497@htb-5mix2gkv1a]─[~]
└──╼ [★]$ nc -v 10.129.233.197 49704

10.129.233.197: inverse host lookup failed: Unknown host
(UNKNOWN) [10.129.233.197] 49704 (?) open
Now, let's return to our first Terminal and use the connection channel to list the available files in the FTP share. Enter the following command:
Code: shell
We should see a message indicating that a data connection is already open, and therefore a transfer is starting.
Target Acquired
┌─[eu-academy-1]─[10.10.14.21]─[htb-ac-594497@htb-5mix2gkv1a]─[~]
└──╼ [★]$ nc 10.129.233.197 21

220 Microsoft FTP Service
USER anonymous^M
331 Anonymous access allowed, send identity (e-mail name) as password.
PASS anything^M
230 User logged in.
PASV^M
227 Entering Passive Mode (10,129,233,197,194,40).
LIST^M
125 Data connection already open; Transfer starting.
226 Transfer complete.
When we check back on our other Terminal, we will see a list of the files available in the share!
Target Acquired
┌─[eu-academy-1]─[10.10.14.21]─[htb-ac-594497@htb-5mix2gkv1a]─[~]
└──╼ [★]$ nc -v 10.129.233.197 49704

10.129.233.197: inverse host lookup failed: Unknown host
(UNKNOWN) [10.129.233.197] 49704 (?) open
02-08-25  08:37PM                  438 Note-From-IT.txt
We see that there is a Note-From-IT.txt text file available for us to read. To retrieve the file, we must once again enter the following command in our connection channel, then use netcat to establish connection to a new data channel.
Code: shell
The output will be similar to when we ran the command the first time.
Target Acquired
┌─[eu-academy-1]─[10.10.14.21]─[htb-ac-594497@htb-5mix2gkv1a]─[~]
└──╼ [★]$ nc 10.129.233.197 21

220 Microsoft FTP Service
USER anonymous^M
331 Anonymous access allowed, send identity (e-mail name) as password.
PASS anything^M
230 User logged in.
PASV^M
227 Entering Passive Mode (10,129,233,197,194,40).
LIST^M
125 Data connection already open; Transfer starting.
226 Transfer complete.
PASV^M
227 Entering Passive Mode (10,129,233,197,194,50).
Again, we must calculate the port number, and use netcat to make the connection.
194 * 256 + 50 = 49714
Target Acquired
┌─[eu-academy-1]─[10.10.14.21]─[htb-ac-594497@htb-5mix2gkv1a]─[~]
└──╼ [★]$ nc -v 10.129.233.197 49714

10.129.233.197: inverse host lookup failed: Unknown host
(UNKNOWN) [10.129.233.197] 49714 (?) open
Sending one final command, we can retrieve the Note-From-IT.txt text file.
Code: shell
Target Acquired
┌─[eu-academy-1]─[10.10.14.21]─[htb-ac-594497@htb-5mix2gkv1a]─[~]
└──╼ [★]$ nc 10.129.233.197 21

220 Microsoft FTP Service
USER anonymous^M
331 Anonymous access allowed, send identity (e-mail name) as password.
PASS anything^M
230 User logged in.
PASV^M
227 Entering Passive Mode (10,129,233,197,194,40).
LIST^M
125 Data connection already open; Transfer starting.
226 Transfer complete.
PASV^M
227 Entering Passive Mode (10,129,233,197,194,50).
RETR Note-From-IT.txt^M
125 Data connection already open; Transfer starting.
226 Transfer complete.
When we check the data channel, we are greeted with the contents of the note.
Target Acquired
┌─[eu-academy-1]─[10.10.14.21]─[htb-ac-594497@htb-5mix2gkv1a]─[~]
└──╼ [★]$ nc -v 10.129.233.197 49714

10.129.233.197: inverse host lookup failed: Unknown host
(UNKNOWN) [10.129.233.197] 49714 (?) open
Bertolis,

The website is still under construction. To stop users from poking their nose where it doesn't belong, I've configured IIS to only allow requests containing a specific user-agent header. If you'd like to test it out, please provide the following header to your HTTP request.

User-Agent: Server Administrator

The site should be finished within the next couple of weeks. I'll keep you posted.

Cheers,
jarednexgent
The note from the IT team has some revealing information. It turns out, the web server is configured to only allow requests that provide a specific user-agent header. We have seen how the FTP protocol recognizes commands such as USER, PASS, PASV, LIST, and RETR. The HTTP protocol, on the other hand, utilizes a system of requests and responses consisting of HTTP headers. By providing the header User-Agent: Server Administrator, we should be able to view the website that is being served via port 80.
Let us make our initial TCP connection with netcat using the command shown below:
Code: shell
We are met with a message indicating that the port is open.
Target Acquired
┌─[eu-academy-1]─[10.10.14.21]─[htb-ac-594497@htb-5mix2gkv1a]─[~]
└──╼ [★]$ nc -v 10.129.233.197 80

10.129.233.197: inverse host lookup failed: Unknown host
(UNKNOWN) [10.129.233.197] 80 (http) open
Now, we can formulate our request. Enter the following into your netcat session:
Code: shell
The web server responds! Unlike when we use our web browser (which makes the HTTP request for us automatically, then renders the HTML into an aesthetic, readable website), with netcat the contents of the webpage are printed to our terminal. We can also find a flag hidden in the comments of the HTML, which would not be visibile if we were to use our web browser.
Target Acquired
┌─[eu-academy-1]─[10.10.14.21]─[htb-ac-594497@htb-5mix2gkv1a]─[~]
└──╼ [★]$ nc -v 10.129.233.197 80
10.129.233.197: inverse host lookup failed: Unknown host
(UNKNOWN) [10.129.233.197] 80 (http) open
GET / HTTP/1.1
Host: 10.129.233.197
User-Agent: Server Administrator
HTTP/1.1 200 OK
Content-Type: text/html
Accept-Ranges: bytes
ETag: "5acd7854a179db1:0"
Server: Microsoft-IIS/10.0
Date: Tue, 5 Feb 2025 00:44:43 GMT
Content-Length: 746
<!DOCTYPE html PUBLIC "-//W3C//DTD XHTML 1.0 Strict//EN" "http://www.w3.org/TR/xhtml1/DTD/xhtml1-strict.dtd">
<html xmlns="http://www.w3.org/1999/xhtml">
<head>
<meta http-equiv="Content-Type" content="text/html; charset=iso-8859-1" />
<title>IIS Windows Server</title>
<style type="text/css">
<!--
body {
color:#000000;
background-color:#0072C6;
margin:0;
}
#container {
margin-left:auto;
margin-right:auto;
text-align:center;
}
a img {
border:none;
}
-->
</style>
</head>
<body>
<div id="container">
<a href="http://go.microsoft.com/fwlink/?linkid=66138&clcid=0x409"><img src="iisstart.png" alt="IIS" width="960" height="600" /></a>
</div>
</body>
</html>
<!-- HTB{REDACTED} -->
GET / is an HTTP request that tells a web server "Give me the homepage (root directory) of this website." If there were a login page we wanted to access, our request might look like GET /login.php. The Host header tells the server which host we are requesting (it is possible for a server to host multiple, unique webpages all on the same server). The User Agent header is used to indicate the agent making the web request --- for example, if it's a browser making the request, the user agent will typically be the name and version of the browser.
The server, in turn, replies with it's own headers. For example, the Content-Type header tells us what type of data the server is replying with. The Accept header tells us what type of data it is able to receive, and the Server header tells us that the web server software in place is Microsoft IIS. Below these headers is the HTML of the site we are attempting to access.
We have now seen first hand how the FTP and HTTP protocols work. By sending specific packets of data, we adhere to the protocol (i.e., the specific "language") that a particular service speaks. We have seen how FTP utilizes both a data channel and connection channel, and how its protocol requires new-line and return characters be submitted. Conversely, we have seen the HTTP protocol be more forgiving syntactically, while at the same time showing merciless intolerance for requests that do not adhere to the administrator-defined specification (i.e., the user-agent header request filtering).
With that, we conclude chapter three. Use what you learned in this chapter and try to complete the optional exercises below.
VPN Servers
Warning: Each time you "Switch", your connection keys are regenerated and you must re-download your VPN connection file.
All VM instances associated with the old VPN Server will be terminated when switching to a new VPN server.
Existing PwnBox instances will automatically switch to the new VPN server.
US Academy 4 US Academy 2 US Academy 6 US Academy 3 US Academy 5 US Academy 1 EU Academy 5 EU Academy 3 EU Academy 4 EU Academy 6 EU Academy 1 EU Academy 2
PROTOCOL
UDP 1337
TCP 443
Exercises
Q: What IPv4 address is used when a host wants to send and receive network traffic to itself?
A: 127.0.0.1
Q: What is the the name of the Program listening on localhost:5901 of the Pwnbox?
A: Xtigervnc
Q: Which network interface allows us to interact with target machines in the HTB lab environment?
A: tun0
Q: What is the FTP command used to retrieve a file? (Format: XXXX)
A: RETR
Q: Bypass the request filtering found on the target machine's HTTP service, and submit the flag found in the response. The flag will be in the format: HTB{...}
A: HTB{S00n_2_B_N3tw0rk1ng_GURU!}
Optional Exercises
Q: What is the FTP command used to retrieve a file? (Format: XXXX)
A: RETR
Q: Bypass the request filtering found on the target machine's HTTP service, and submit the flag found in the response. The flag will be in the format: HTB{...}
A: HTB{S00n_2_B_N3tw0rk1ng_GURU!}